The hull looks much better now! there are still a few minor defects, which I expected, but at least it is now under control. I decided to let this part of the build set for a while, to fully cure and assemble some of the sub assemblies for the deck. the deck will be next on the list.....I want to install waterways and cut out the scuppers in the bulwarks.
I started with the cargo holds and the lockers, assembling the main parts of their structure. I used the larger hold's roof parts to create a square, to give them the correct angles.
the roof parts were then cleaned up and I had beveled the joining edges of the two "dual" roof assemblies, so the would mate together without a gap at the top. I was setting up to cement the roof on the structure that I would assume, is the "gangway" below deck, when disaster struck. the roof is made of very thin plywood and must make a gradual bend toward the deck. I had cemented in a couple extra bits of wood for support and better anchor points to cement the roof on. I had also wet the roof part and let it set in a wet paper towel to give it more flexibility.......but as I started to bend it, it broke in three pieces! I was not surprised by this and not deterred by it either....I just made another one using balsa.
I must have misread the direction with the assembly of the other structures, because the roofs didn't fit them either....only the flat ones had this problem, so I made roofs for them as well.
the pilot house was the next to be worked on while these assemblies were drying. the outer walls needed to be planked and I also planked the floor inside. the port holes were very easy to cut out, once the planking was cemented on. I test fitted one of the porthole frames and was happy with how it looked. the base was painted at this time and the hold at the front was cemented into place.
I put a bit of detail to the slanted roofs by adding slats to them. after this was done, they were painted in the color that they were to be....the scheme of the deck. I love this color "green".
while I was doing this, I had a thought.....how do they get in and out of the pilot house? simple.....with the use of steps.....on both sides of the house! I set to work........
I then assembled the winch and started to work on the pilot house roof. later, fittings were added and more detail was added to the locker and gangway.
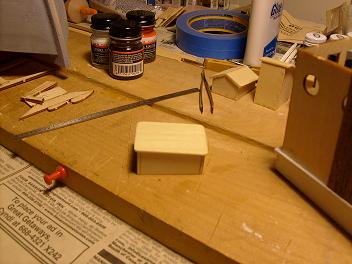
I also have the paints for her. I have here....International Orange, Dark Drab, and white. these will be the hull colors, the deck, I am relying on the colors I have on hand. I then set up the structures onto the deck, using the schematic as to where everything should be. I have not drilled the mast holes as of yet.....that is for the next build log......I want to try to get the hull painted before Christmas. then I can plank the deck and put all this together.
As more fittings are added to the mix, the ship's character will emerge. all this looks very plain for now, but the deck planking will change all that as well. as soon as I can trace out all the placements, I can begin and give this build a giant leap forward.
from the shipyard......have a very Merry Christmas!